It would be difficult to go about your daily life without seeing a single flier promoting something. But what do you do if you see one that interests you? How do you follow up on the information? Well, a better question would be how can I better reach out to those that see my flier? And the answer is through QR codes!
QR codes have become an expected feature of flyers and allow for more engagement opportunities by providing easier access to additional information, like websites and text documents.
In this piece, I will show you how you can add a QR code to your flier, as well as share some tips on how to get the most out of your codes.
Why Add a QR Code to Your Flyer?
Flyers can often be crucial to promoting your brand, service, business, or whatever else you need to advertise. However, there’s only so much you can put on one piece of paper. For this reason, QR codes are just about essential for providing additional information to your audience. These are some more reasons why you must add a QR code to your flyers:
- Instant Access: Instead of using a long URL, a QR code can give instant access to all your promotional offers and deals within seconds.
- Trackable Results: With a QR code, you can easily track how, when, and where people scanned it. This helps you measure the effectiveness of your flyer and fine-tune your marketing strategies.
- Better Engagement: QR codes provide better engagement as potential customers can interact with your business immediately. Whether it’s signing up for an event, downloading an offer, or visiting a website, they can take action right away.
- Cost-Effective: Flyers are already a low-cost way to promote your business. Adding a QR code is an affordable way to make them even more effective, along with giving your audience a way to learn more or take action without any additional costs.
Additionally, you’ll be surprised to know that the average response rate of a traditional flyer is between 1% and 5%, while QR code is 6.4%. Therefore, adding QR codes to your marketing campaigns is a great way to attract customers. 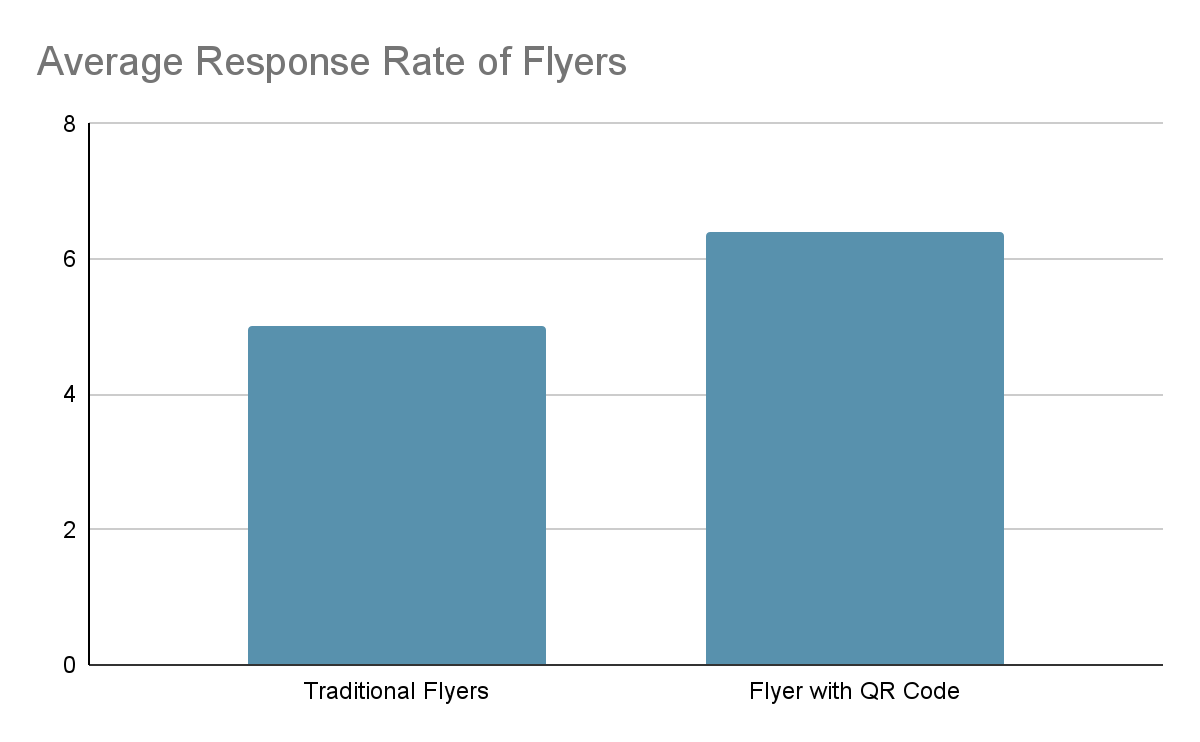
Steps to Add a QR Code to Your Flyer
Now follow these exact steps to start creating QR codes using the QR Code Developer and easily add them to your flyer in this way:
Step 1: Sign-In to QR Code Developer
First, go to QR Code Developer (https://qrcodeveloper.com/) and login to your account. If you don’t have an account yet, then you can Create your account. 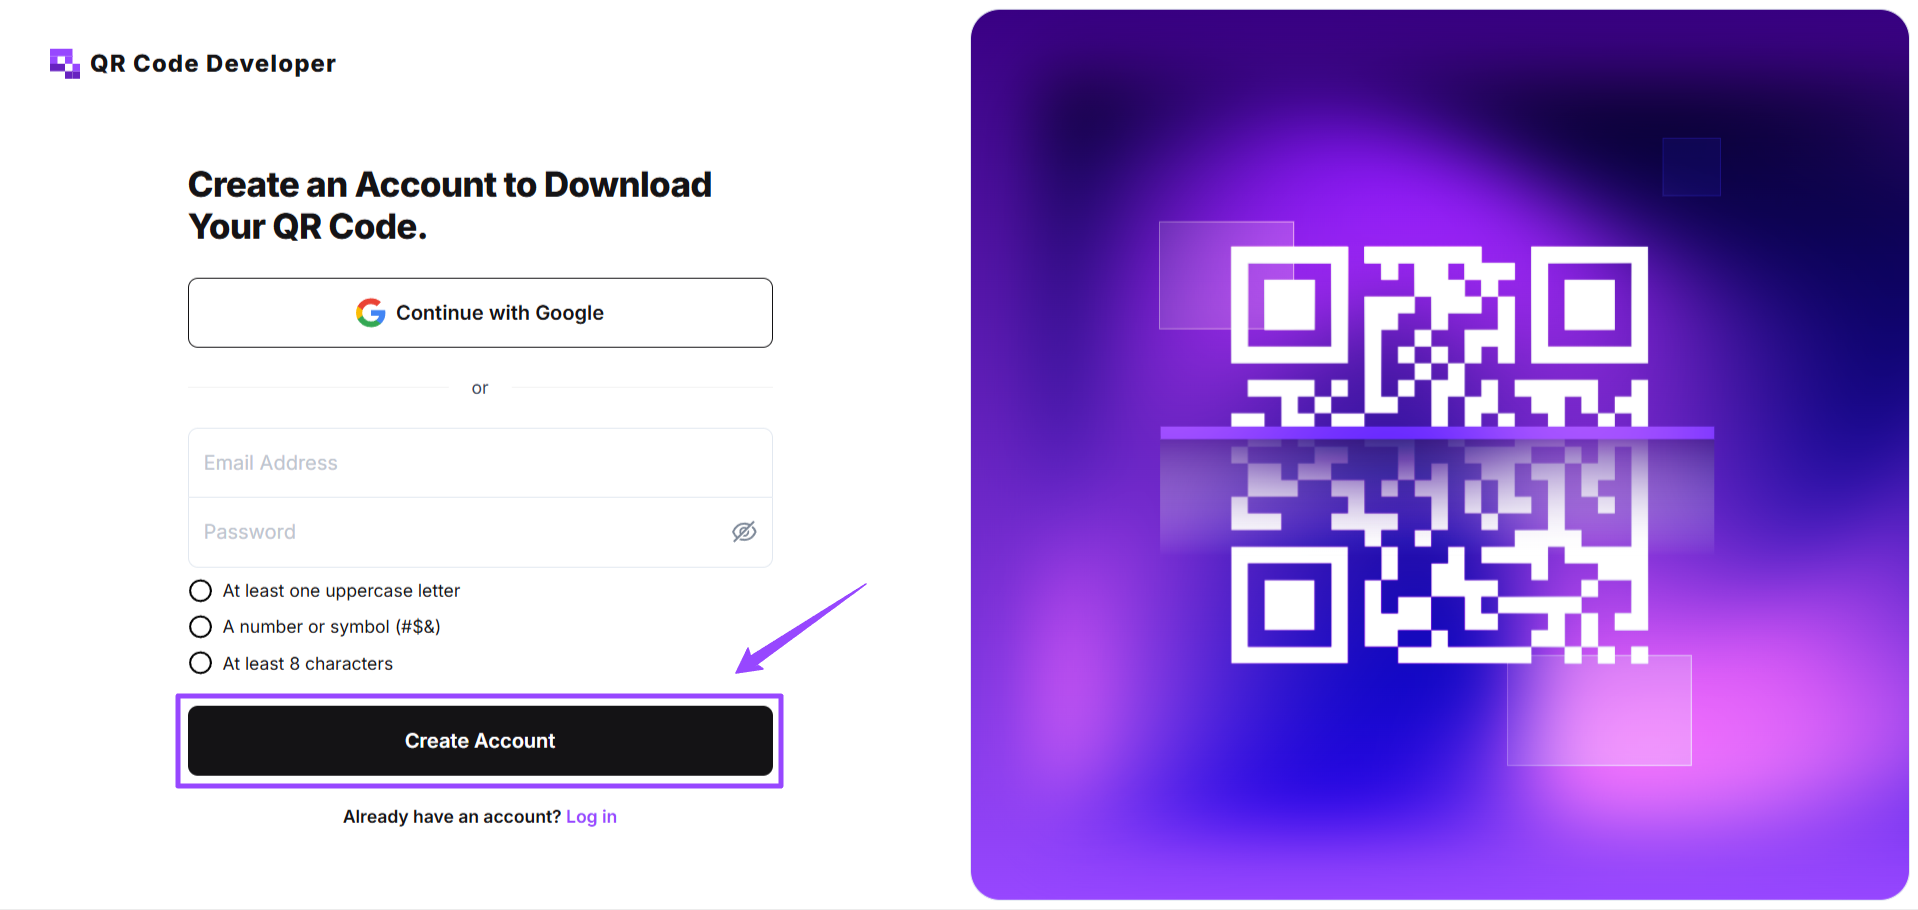
Step 2: Access Your Dashboard
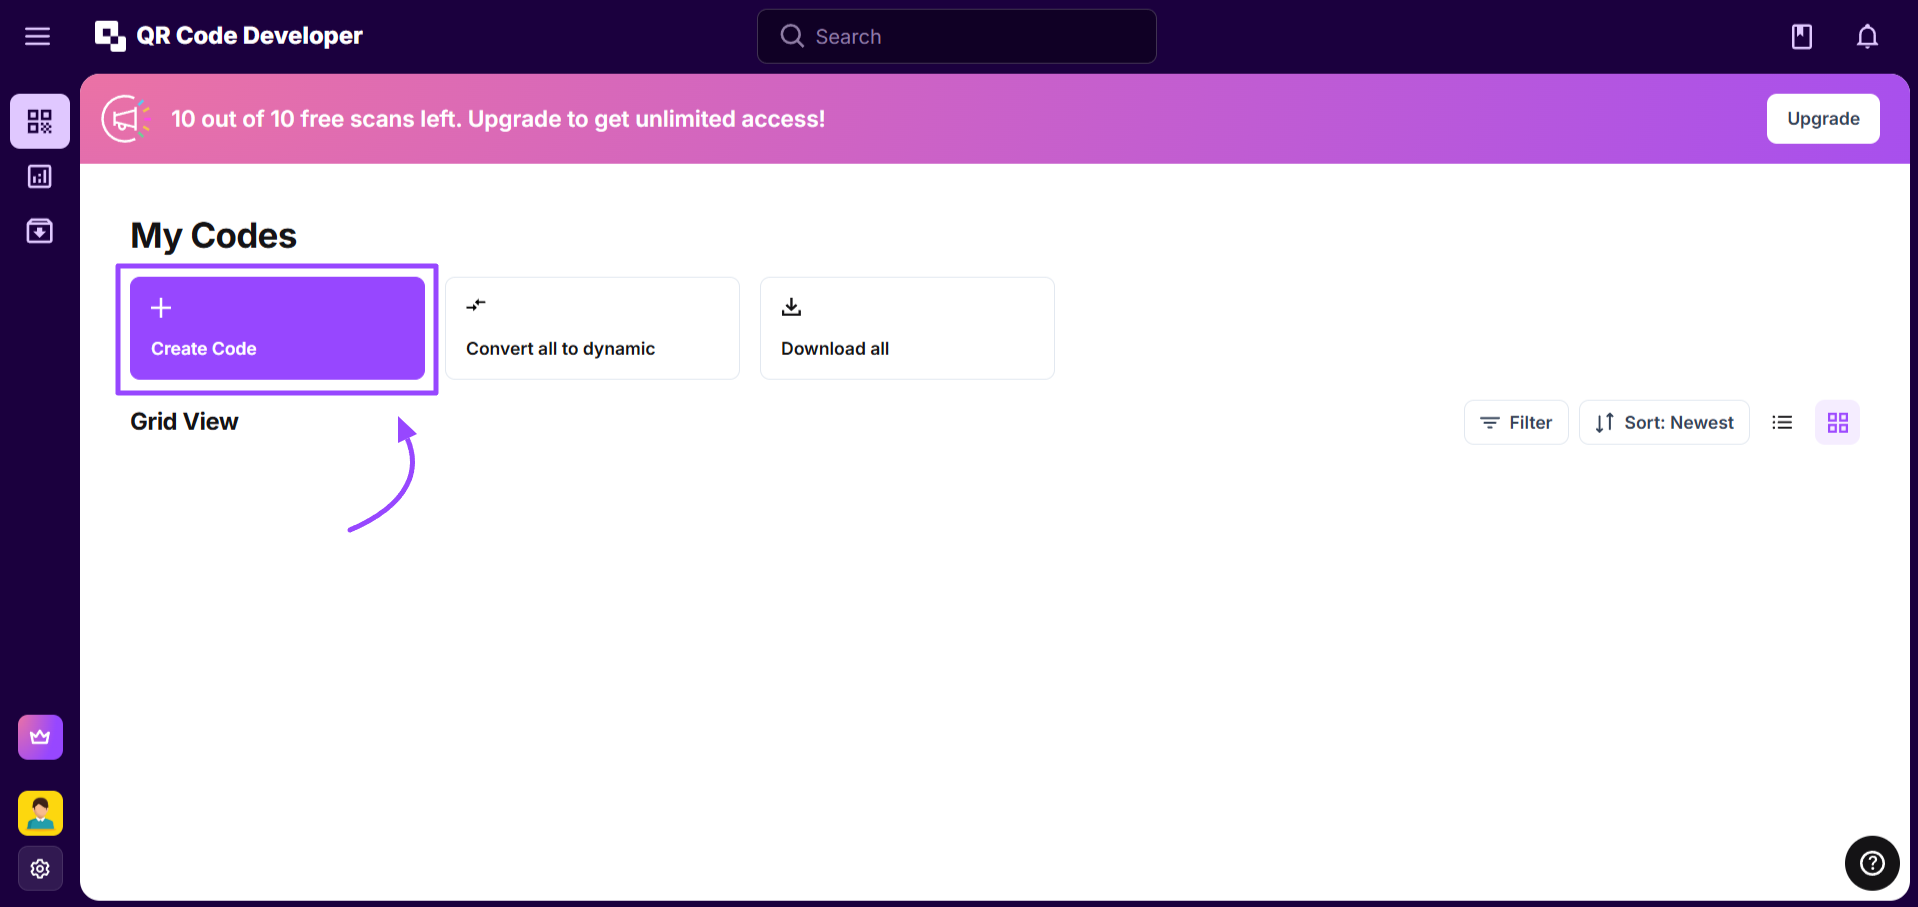
Once you create your account, you’ll be automatically redirected towards the dashboard and you’ll see options to start creating QR codes. Click Create Code under the My Codes tab.
Step 3: Start Creating Your QR Codes
Choose the code type you want. For this code it would be best to select the Web Page option.  Then, type in the name of the website and insert its URL. Once everything looks good, click on Generate.
 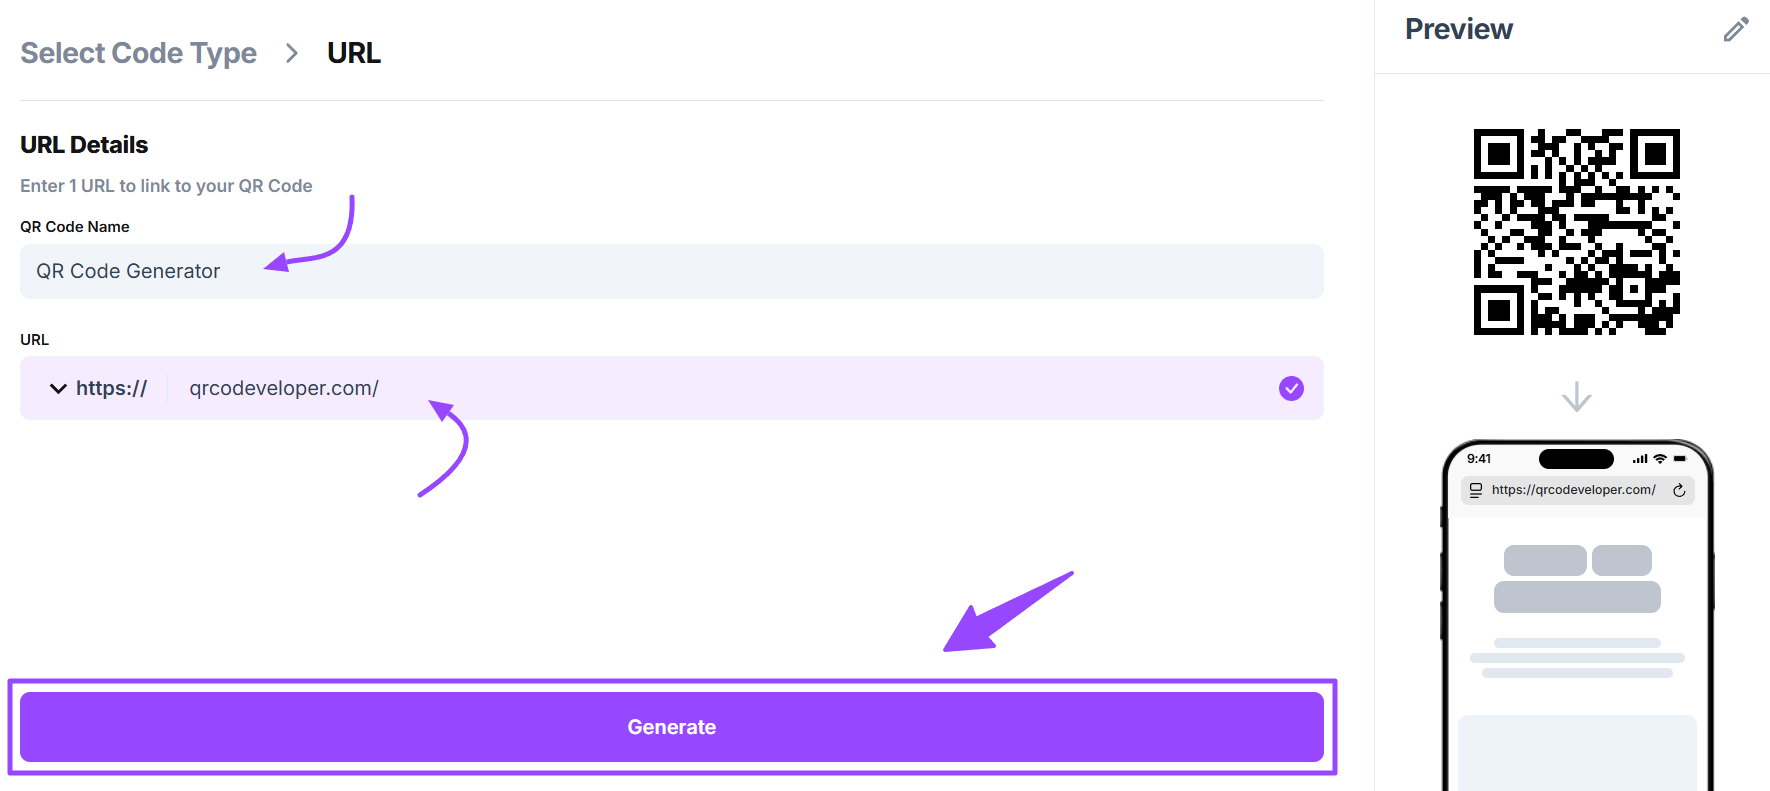 That’s it! You’ve successfully generated a QR code that will automatically redirect the users to the website once they scan the QR code.
 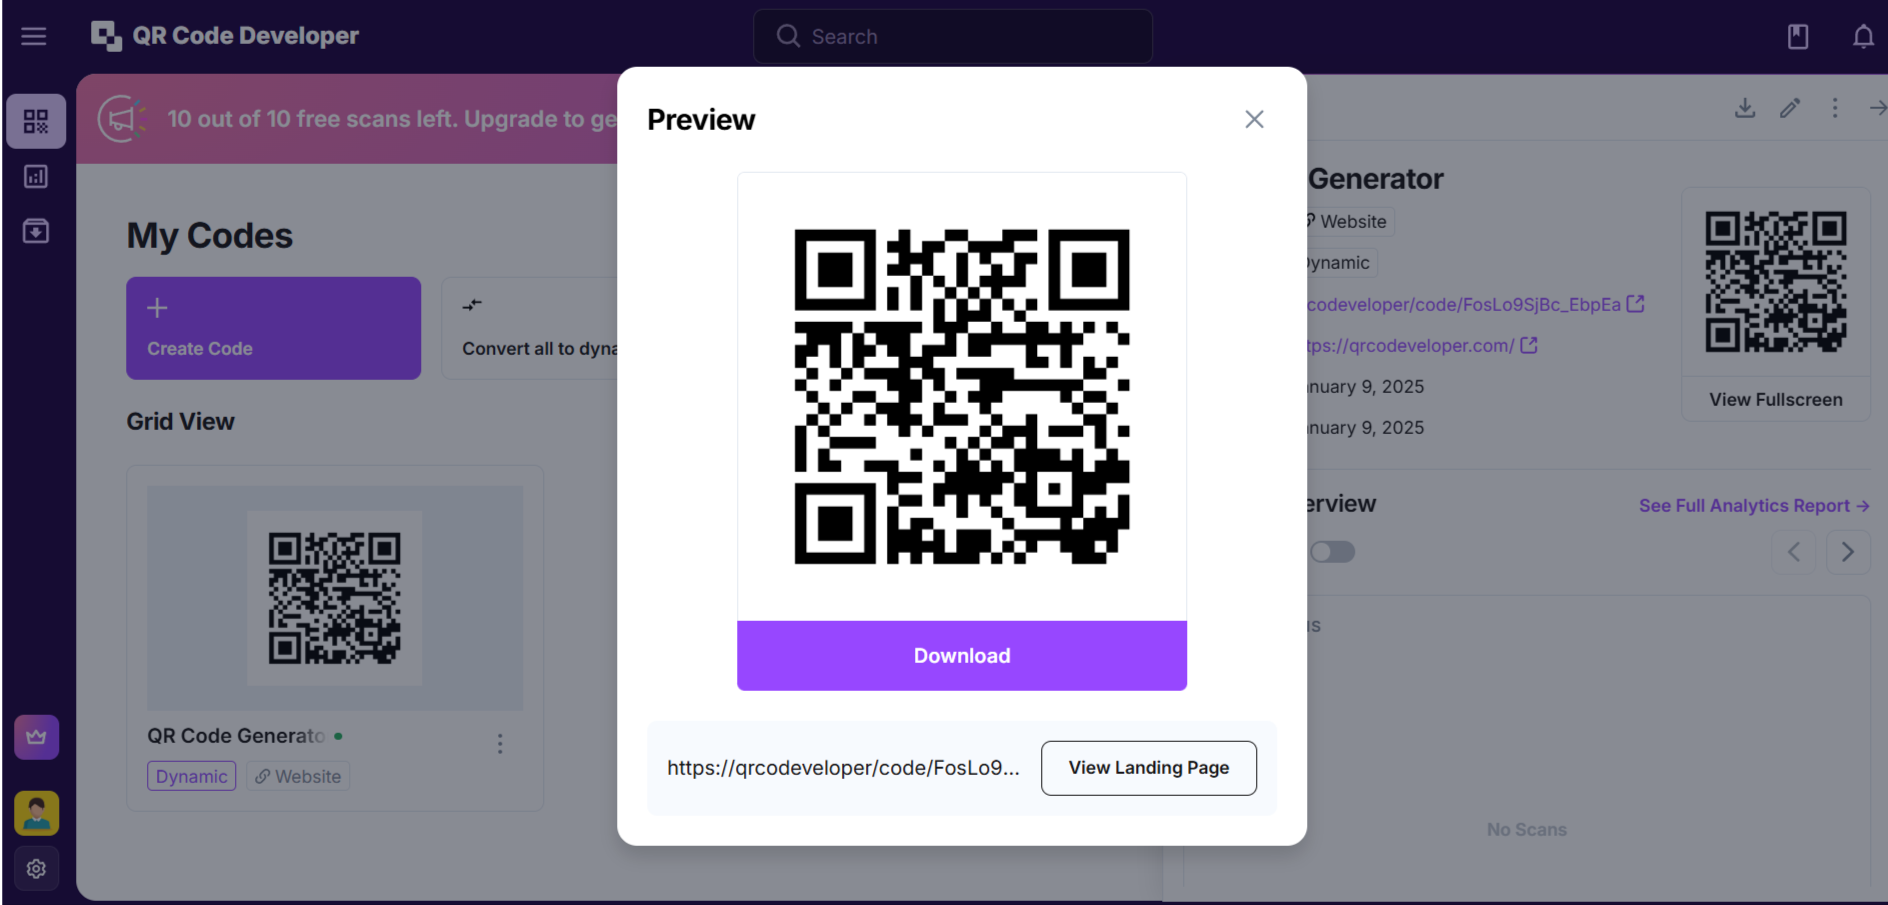 Make sure to test your code with multiple devices.
Step 4: Add to Your Flyer
First, design your flyer with your program of choice (like Canva, Adobe, or Photoshop). Once the design is ready, all you have to do is attach the QR code and hit print!.
| Quick Tip: Make sure to check your QR code in order to make sure that it’s working properly and is collecting analytical data. |
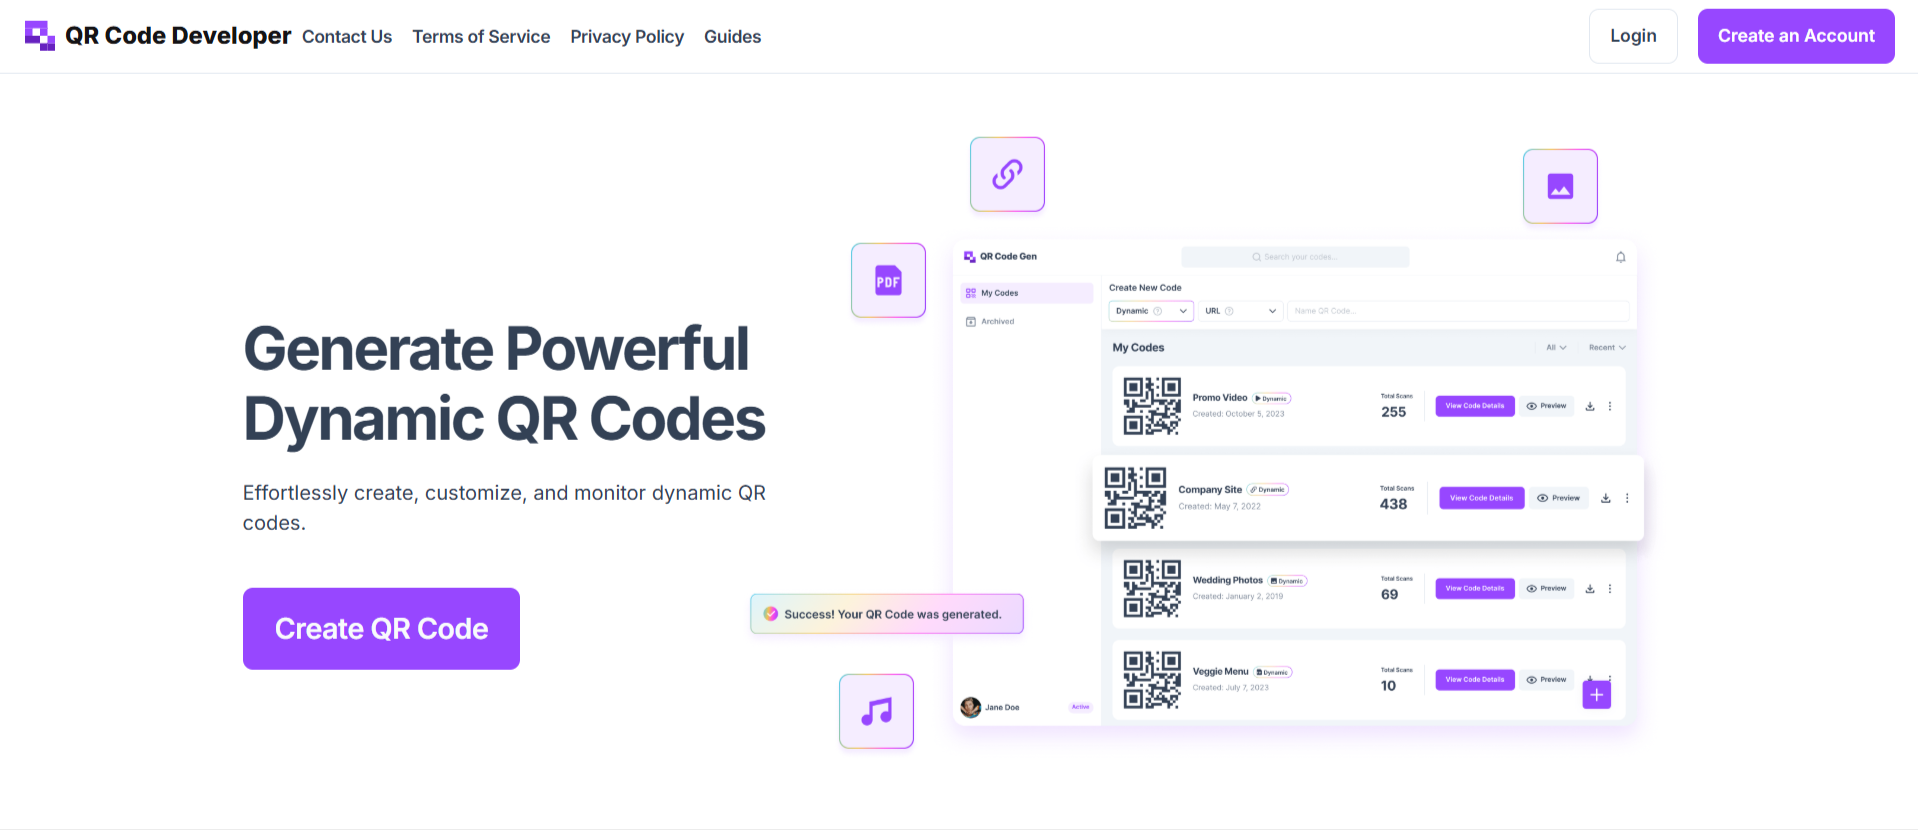 QR Code Developer is a powerful platform to generate dynamic QR codes. It’s easy, intuitive, and allows you to create QR codes for all sorts of media, like Images, URLs, PDFs, Music, and more, in just a few easy steps. QR Code Developer also offers several other benefits, such as:
- Customizable Designs: You can easily customize the color, add a logo, or change the style of your QR code to align with your branding. This will make your flyer look more professional and fit your brand.
- Multiple QR Code Formats: With QR Code Developer, you can select a variety of formats such as urls, images, text, pdfs, and more.
- High-Quality Outputs: QR Codeveloper can generate high-resolution QR codes that are suitable for both digital and print media.
- Analytics Dashboard: You can easily track scans by country, language, OS, city, and you’ll even be able to see unique scans.
Pro Tips for Using QR Codes Effectively on Flyers
Putting a QR code on your flyer is a strategic move. It will generate more responses, engagement, and attract customers once they scan a QR code. But placement and visibility is also crucial to getting scans. These are some of the pro tips to make the most of your QR code:
- Add a Clear Call-to-Action (CTA)
No one’s going to scan your QR code if it doesn’t have a clear CTA guiding customers on what they’ll receive. Adding a clear CTA like:
- Get 20% Off – Scan Now!
- Scan & Get Free Delivery
- Keep It Scannable
Ensure your QR code is large enough to scan easily, even from a distance. A size of at least 1 x 1 inch works well for most flyers. - Use Contrasting Colors
To make sure your QR code is more visible. Use contrasting colors for the code and its background so it’s easy to scan. Avoid overly dark or busy designs that might interfere with scanning. - Place It Strategically
Position the QR code where it’s easy to see and scan, such as near the flyer’s main message or at the bottom alongside your contact information. - Test Before Printing
Always test your QR code with multiple devices to ensure it works seamlessly. This helps avoid printing errors that could make the code unusable. - Combine with Incentives
To encourage people to scan, you have to offer something in return, such as a discount, free resource, or exclusive access. Incentives can make your flyer more engaging and will drive more QR scans. By following these tips, you’ll ensure that your codes are functional, easy to use, and provide the best information to your audience. Read More:
Conclusion
Using a QR code in your flyers is a smart way to attract customers and increase engagement. Codes can also efficiently fill the gap between your offline and online audience. Using QR Code Developer makes creating the QR codes easy. You can promote an event, share contact details, or a special deal in multiple formats. Make sure to incorporate QR codes into your campaigns. It will help you boost customer response and will drive more actions. Start using QR Code Developer, by creating your account for free.
