QR Codes and Museums
How can you use QR codes for museums?
QR codes have many different uses, but for museums and galleries, the best way to use them would be to provide additional information on artworks, artists, specific pieces, and collections. For example, you can place a code underneath a specific piece and have it link to more information on the artwork itself, the artist, possibly their web portfolio, information on the time period and location the piece was made in, and so much more that you wouldn’t be able to fit on an index card sized label.
Museums can also use QR codes for:
- Registration for special events
- Donation pages
- The museum’s website
- Audio information for disabled patrons
- Related works
- Music to accompany the gallery or event
And so much more!
Why use QR codes?
The use and awareness of QR codes has only grown over the years, with usage projected to surge even more over the course of the next few years. If you want your museum, gallery, or exhibition to seem modern and up to date with current standards, then incorporating QR codes is the way to go.
QR codes also make it easier than ever to access crucial information and helpful tools in order to make the experience of the guest so much better. For museums in particular, there’s only so much information you can put on a small placard. With a QR code, you can allow the guest to learn even more about each piece and the story behind it. Additionally, QR codes can be used to check in to events, categorize pieces, incorporate accessibility features, gather feedback, and more.
Many museums are already incorporating QR codes into the guest experience. Find out how here:
How to create a QR code for a virtual museum label
There are many different ways you can use QR codes in a museum, but for the purposes of this piece, I will focus on how to use one for a virtual label that provides additional information on a particular piece. For detailed instructions on how to create codes for other purposes, like to link to a website or event registration forms, we have plenty of other tutorials available on this site.
Step 1:
Create a virtual label for a piece. Make sure to include an image of the work if possible.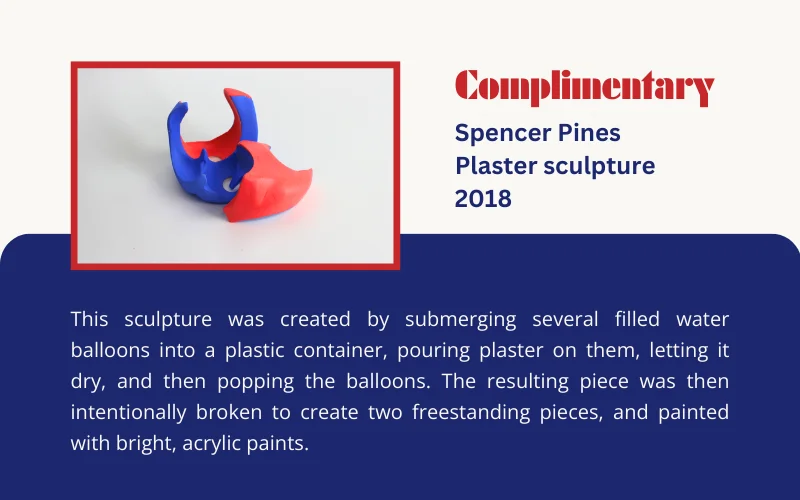
Upload the image to the museum’s website or in some other format that it can be accessed via URL.
Step 2:
Go to QR Codeveloper and select Create CodeStep 3:
Select the Website. If your label is saved as a PDF, you can do the same with the PDF option on the same page.
Step 4:
Paste the link for the page into the bar.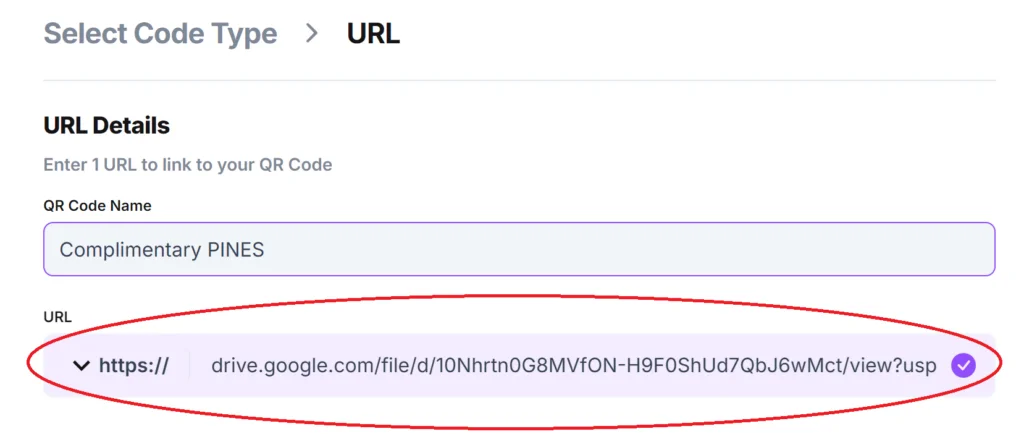
Step 5:
Click on the pencil icon next to the Preview menu to further customize the appearance of your code.Though not necessary for this type of code, you can then customize the appearance. Click Apply when you are done.

Step 6:
Click the Generate button to create the code.Step 7:
Test the code on multiple devices.
Where to place your codes
Where you place your codes depends heavily on what you plan on using them for. If your code redirects to additional information on a specific art piece, then it would be best to place the code near the piece, close to the existing information label. If your code links to the portfolio or information on a specific artist or gallery, then it would be smart to place the code at both the exit and entrance of the event/gallery. If your code links to something specific to the museum itself, or an affiliated organization, then they can be placed around the museum, particularly at the entrance or lobby, as well as on fliers and business cards.
The best places to physically place a QR code are:
- Posters
- Business cards
- Fliers
- Stickers (on a flat surface)
Monitoring code usage
With the tools available on QR Codeveloper, as well as other code generators, you can monitor the usage of any code you create. This can include how many times a code has been scanned, where it has been scanned, on what device, using what browser, and more. With these tools you can figure out which codes are reaching the most people and where to focus any advertising efforts.
With QR Codeveloper you can monitor:
- Number of scans.
- Number of scans by operating system.
- Scans by browser.
- Scans by country.
- Scans by city.
- Scans by language.
- Unique scans.

Tips
- Know your audience
- Make codes with high contrast
- Test codes on multiple devices
- Monitor code usage
- Place in areas that are easy to scan
- Provide additional information on where the code leads
- Only place codes on a flat surface
Conclusion
If you are a museum owner, curator, operator, or anything else having to do with the day to day operations, then you can use QR codes in all sorts of ways to make the museum experience better for the artists, patrons, donors, other employees, and yourself. QR codes can help modernize a museum, allowing guests to learn more about a particular piece or about the museum itself. In addition, these codes are easy to make, all you need is the URL to where you want to code to link to and you can use QR Codeveloper, or any other QR code generating service, to create functional codes in minutes!
Ready to create your QR code?
Generate custom QR codes in seconds - free and easy to use.
Create Free QR Code →